4.8/5 on Trustpilot

You finished the mix. It sounds huge in your headphones. Then you send it off to be mastered — and it comes back distorted, harsh, and squashed. Nine times out of ten, the culprit is headroom, or the lack of it. Leave enough space at the top of your mix and mastering has room to work its magic. Fill it to the brim and there's nowhere left to go but into distortion.
In this guide we'll break down exactly what headroom is, why it decides whether your master sounds professional or crushed, and the simple target range that keeps your mix ready for the final stage. This is headroom, simplified.

What is headroom in mixing?
Headroom is the space between the loudest part of your mix and 0 dBFS — the point in the digital world where distortion, called clipping, occurs. Think of it like leaving space at the top of a jar before you screw on the lid. If you fill it right to the very top, there's no room to add anything without it spilling over.
In a mix, that "room at the top" is what lets a mastering engineer — or you, later — boost frequencies, add compression, and raise the overall loudness without pushing the signal past 0 dB and into harsh digital distortion. A mix with no headroom is already at the ceiling. Any extra processing has nowhere to go.
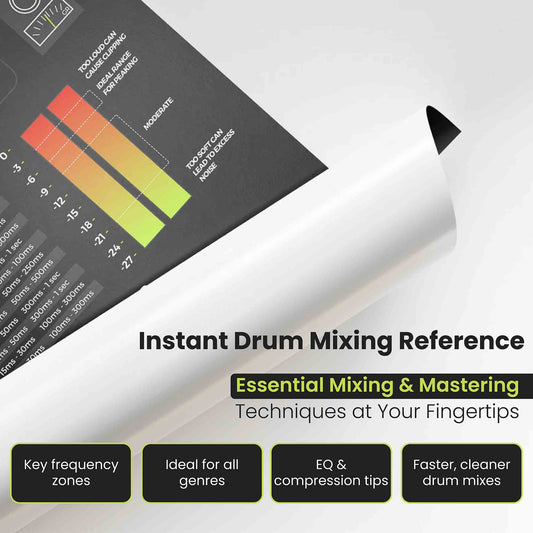
The target is simple: your loudest moments should peak somewhere between -6 dB and -3 dB. That's the sweet spot — quiet enough to leave a clean, dynamic foundation, loud enough that your mix still feels full and impactful.
How headroom works
Every digital audio system has a hard ceiling at 0 dBFS. Below that ceiling is your usable range. Above it, there's nothing — the signal simply can't go higher, so it "clips," flattening the tops of your waveforms and creating that unpleasant crunchy distortion.
The reason headroom matters so much comes down to what happens after the mix. Mastering brings out every detail. It raises the overall volume, adds clarity, and enhances the full frequency spectrum. That means any peak sitting too close to 0 dB gets pushed over the edge the moment mastering processing is applied. Leave -6 dB to -3 dB of room, and mastering has a clean, dynamic canvas to build on. Leave none, and every move during mastering risks clipping.

The easiest way to keep an eye on this is the master output meter in your DAW. Green or yellow levels are safe and indicate healthy headroom. Orange means you're getting close to the limit and should proceed with caution. Red peaks mean clipping is happening, and that has to be fixed before you finalize your mix.
How to set proper headroom (4-step plan)
Step 1 — Watch the master meter as you mix
Keep the master output meter visible the entire time you work. You're looking for the loudest section of the song — usually the final chorus or drop — to peak in the green-to-yellow range. If it's creeping into orange or flashing red, you already know you have work to do.
Step 2 — Fix clipping at the source, not the master fader
When you see red, resist the urge to simply pull down the master fader. That's a band-aid. Instead, lower the volume of the individual tracks or groups that are pushing the level up. Rebalancing your mix keeps everything under control and preserves the relationships between your instruments, rather than just shrinking the whole thing.
Step 3 — Set your target range
Aim to have your loudest moments peak between -6 dB and -3 dB. This provides enough space for mastering while keeping your mix full and impactful. If your peaks are landing well below -6 dB, that's fine too — extra headroom never hurts. The problem is only ever too little, not too much.
Step 4 — Do a full-song headroom pass
Once your headroom is set, play through the entire song, paying special attention to the loudest sections. You're double-checking for sudden peaks or distortion you might have missed. With clean headroom and no clipping anywhere in the track, your mix is genuinely ready for the final step: mastering.
Common mistakes to avoid
- Mixing everything as loud as possible. Pushing every fader up until the master is slamming 0 dB feels satisfying, but it leaves zero room for mastering. Loudness is mastering's job — your job is balance and headroom.
- Using the master fader to "fix" clipping. Turning down the master output hides the symptom but not the cause. Rebalance the individual tracks instead so your mix stays clean and controlled.
- Leaving normalization on during export. Normalization automatically raises your volume to a target level, which can wipe out the careful headroom you just set. Turn it off.
- Ignoring short, sudden peaks. A single transient — a snare hit, a vocal consonant — can spike into the red even when the average level looks fine. Scan the whole song, not just the loud sections you expect.
- Assuming mastering will "just fix it." Mastering enhances a good mix; it can't rescue a clipped one. Distortion baked into the mix can't be removed later.
Why headroom matters
Headroom is the difference between a mix that's simply finished and one that's truly polished. A finished mix has all the elements in place — levels set, nothing missing. A polished mix goes further: smooth transitions, clean fades, balanced dynamics, and plenty of headroom for mastering.
Think of this stage as quality control, like a manufacturer inspecting a product before it leaves the factory. Getting headroom right gives you three concrete wins: mastering has room to raise loudness and clarity without distortion, your track keeps its natural dynamics instead of getting crushed, and the final result translates cleanly across every playback system — from studio monitors to a phone speaker. Master engineers can spot an amateur mix instantly by how little headroom it has. Getting this one thing right puts you ahead.
Take it further
The full walkthrough of finalizing and mastering — headroom, gain staging, exporting, and the complete mastering chain — is covered step by step in Mixing & Mastering Simplified. Same clear, visual style you're reading here.
Want the key targets and settings next to your DAW while you work? The Mixing & Mastering Cheat Sheet Poster and Cheat Sheet Mousepad put headroom, gain staging, and export settings right where you can see them.
Chasing frequency clarity too? The Instrument Frequency Cheat Sheet Poster maps where every instrument sits in the spectrum. Or grab everything together in the Mixing & Mastering Bundle.

FAQs about headroom in mixing
How much headroom should I leave for mastering?
Aim for your loudest peaks to land between -6 dB and -3 dB. That leaves enough clean space for the mastering engineer to add EQ, compression, and limiting without pushing the signal into distortion.
What is 0 dBFS?
0 dBFS (decibels relative to full scale) is the maximum level in the digital domain. Any signal that tries to go above it clips, producing harsh digital distortion. Headroom is simply the distance between your loudest peak and this ceiling.
Should I use the master fader to control headroom?
Not as your main tool. If you're clipping, lower the individual tracks or groups causing the problem rather than just pulling the master fader down. Rebalancing preserves the mix; the master fader only shrinks it.
Does leaving lots of headroom make my mix too quiet?
Temporarily, yes — but that's the point. Mastering is where loudness is added. A quieter, dynamic mix with -6 dB of headroom will end up louder and cleaner after mastering than a mix that was already slammed against 0 dB.
Should normalization be on or off when I export?
Off. Normalization automatically adjusts your volume to a target level, which can destroy the balance and headroom you carefully set. Export with normalization off so your mix leaves exactly as you intended.
This post is part of Musiciangoods' Mixing & Mastering Simplified series — practical audio engineering, taught visually, for producers who want to understand what they're doing and why. Explore more mixing and mastering tools here.