 4.8/5 on Trustpilot

Most first-time home studios are bought, not built. A producer reads a gear roundup, drops €1,500 on a microphone, an interface, monitors and a thicket of cables, plugs it all in, records a vocal, and discovers it sounds worse than the demo on their phone. The instinct is to buy more. The actual problem is almost always the same two things: the room, and the order the gear went in.
This guide walks through a home studio setup from the inside out — what to buy first, what to skip, how to wire it, and the room-level changes that move the needle more than any single piece of equipment. The target is a setup that records and mixes professional-sounding music without spending more than €1,000 on the first round. It assumes you already have a computer that can run a modern digital audio workstation. Everything else is covered below.
The five things that matter (and the order to buy them)
Almost every "what gear do I need" list gets the items right and the order wrong. The order matters more than the brand. Buy in this sequence and a €500 setup outperforms most €2,000 ones bought in the wrong sequence.
1. The room — before any gear
The single biggest variable in how a home recording sounds is the room it was recorded and mixed in. Hard parallel walls reflect sound back into the microphone, smear the low end, and lie to you about how your mix balances. A €100 microphone in a treated corner beats a €1,000 microphone in a bare bedroom — every working engineer agrees on this and almost every beginner ignores it.
The minimum viable room treatment for a bedroom studio: a thick rug on the floor, a soft surface (curtain, blanket, sofa) on at least one wall behind the listening position, and something absorptive in the corners where bass energy builds up. Bookshelves filled with books work well as broadband absorbers. If the room has hard walls on both sides of the desk, hanging moving blankets on one of them will do more for the mixes than any plugin.
Skip foam panels at this stage. The thin foam in beginner bundles addresses high frequencies that were never the problem and does nothing for the low-mid build-up that is. Save the treatment budget for proper broadband panels later, or build your own from rockwool when the room becomes the bottleneck.
2. The audio interface — the brain of the setup
The interface is the converter that turns microphone and instrument signals into digital audio your computer can record, and vice versa for playback. It is the most important purchase after the room because every other piece of gear connects through it.
For a first interface, two inputs is the right number. One feels constraining the first time you want to record an acoustic guitar with two mics, and four or more invites you to spend money on inputs you do not yet use. The €120-€250 range is the sweet spot: clean preamps, usable headphone amp, low-latency drivers, and direct monitoring so you can hear yourself sing without the round-trip lag through the computer.
If you want concrete model picks within that range, we walk through seven options under €300 in the audio interface buying guide. The single most important spec for a first interface is not preamp colour or sample rate ceiling — it is the quality of the manufacturer's drivers on your operating system. Cheap interfaces with unstable drivers cost more in lost recording days than the savings ever justify.
3. Monitoring — headphones first, monitors second
Monitoring is how you hear what you are recording and mixing. The conventional advice is to start with studio monitors. The honest advice for a bedroom producer is to start with a single pair of good closed-back headphones, and only add monitors once the room is treated.
Two reasons. First, in an untreated room, monitors lie to you — the room's resonances colour everything you hear, and you mix to compensate for that colour. The mix then sounds wrong in every other room because the compensation only applied to yours. Headphones bypass the room entirely, which is exactly what an untreated bedroom needs. Second, monitors at usable volume disturb neighbours and family. Headphones do not.
A pair of closed-back headphones around €100-€150 is enough to start tracking and mixing on. Add open-back headphones for mixing reference later, then monitors once the room is treated. We cover specific picks in the mixing headphones guide, and monitor options once you are ready in the studio monitors under €500 guide.
4. One good microphone, not three average ones
The microphone choice depends on what you primarily record. For singers, podcasters, and acoustic-guitar players who sing, a single large-diaphragm condenser in the €100-€200 range covers most use cases. For loud sources — guitar amps, snare drums, screaming vocals — a dynamic mic like the Shure SM57 or SM7B is the right choice, with the SM57 being a fraction of the price and a workhorse for almost any source.
The mistake most first-time setups make is buying a bundle that includes three or four mediocre microphones. One good mic, properly placed in a treated corner, outperforms a closet full of bundle mics every time. Add microphones when you encounter sources the first one cannot handle, not before.
Phantom power matters: condenser microphones need +48V from the interface to operate, which any modern interface supplies. Dynamic mics do not need phantom power and work plugged directly into the same XLR inputs.
5. The DAW — free first, paid later
The digital audio workstation is the software that records, edits, and mixes your audio. Every major DAW does the same fundamental job, and the workflow differences between them matter less than producers on internet forums claim. The right first DAW is whichever one you will actually open and learn.
Most audio interfaces come with a stripped-down version of Pro Tools, Ableton Live Lite, or Cubase LE bundled in. Start there. If the bundled DAW comes with the interface, you have already paid for it, and the workflow translates to the full version when you upgrade. If you want to compare full versions, the DAW for beginners guide covers seven options, including GarageBand (free on Mac), Cakewalk (free on Windows), and Reaper (effectively free with the unrestricted evaluation licence).
Resist the urge to buy plugin bundles in the first six months. The stock plugins that come with any modern DAW are good enough to make a finished record, and learning them deeply teaches the underlying concepts that transfer to expensive third-party plugins later.
Three realistic budget tiers
The five-thing list is the same at every budget. What changes is the price point of each item. Here is what a working setup looks like at three realistic tiers.
The €500 bedroom-producer tier
Audio interface: a clean two-input USB interface around €120 (Focusrite Scarlett Solo, PreSonus Studio 24c, or similar). Microphone: a single dynamic SM58-class vocal mic at €100 plus a basic mic stand and XLR cable at €30. Headphones: a closed-back pair around €100 (Audio-Technica ATH-M40x, Sony MDR-7506). Room treatment: €40 of moving blankets, a rug if one is not already there, and any soft furniture rearranged around the listening spot. Software: the free DAW that ships with the interface, plus stock plugins.
This setup makes finished tracks. The ceiling on its mixes is the room, not the equipment.
The €1,000 committed-creator tier
Upgrade the interface to a two-input model with better preamps (Audient EVO 4, MOTU M2, SSL 2). Add a large-diaphragm condenser microphone for vocals and acoustic sources alongside the dynamic mic. Add a second pair of headphones — open-back for mixing reference — so you can compare a mix on both. Upgrade the room with two or three properly built broadband absorber panels covering first-reflection points either side of the desk.
At this tier the room treatment becomes the difference-maker. The equipment is now better than 90% of the bedroom-producer field. Whether the mixes sound professional or amateur comes down to how the room is treated and how well the producer knows the stock plugins.
The €1,500 ready-for-monitors tier
Add a pair of studio monitors in the €400-€500 range (Yamaha HS5, Kali LP-6, JBL 305P MkII), placed in an equilateral triangle with the listening position and on isolation pads. Add one or two specialist plugins for the genre being produced. The interface, microphones, and headphones from the previous tier all carry forward. Beyond this point, the next meaningful upgrades are usually room (proper bass traps and ceiling cloud) and source-specific microphones, not another interface or DAW.
The signal chain: how it all connects
Knowing what each piece does in the signal chain prevents 90% of the "no sound coming out" troubleshooting calls.
Microphone  ──XLR──▶  Interface  ──USB──▶  Computer / DAW
                          │
                          ├──▶  Headphones (front jack)
                          │
                          └──▶  Studio Monitors (rear TRS outputs)

Instrument ──1/4"──▶  Interface (instrument input)
MIDI keyboard ──USB──▶ Computer (no interface needed)
The microphone runs into the interface via a balanced XLR cable. The interface converts the analogue signal to digital and sends it to the computer via USB. The DAW records that signal and sends playback back to the interface, which converts it back to analogue and outputs to the headphone jack and the monitor outputs simultaneously. Direct monitoring on the interface lets you hear your microphone in real time without the computer round-trip — important for recording vocals and any rhythm-sensitive part.
Instrument inputs accept a quarter-inch jack directly from a guitar, bass, or keyboard. A MIDI keyboard sends note data not audio, so it plugs straight into the computer via USB and bypasses the interface entirely.
The five mistakes that quietly ruin first home studios
Buying the room last instead of first. Already covered, repeated because it is the single most consequential decision. A €1,500 setup in an untreated rectangular bedroom will record and mix worse than a €500 setup in a treated walk-in closet.
Bundle microphones. The four-microphone "studio bundles" sold on Amazon and Sweetwater for €200 include four equally mediocre condensers. One €200 dynamic mic does more for a serious recording habit than four €50 condensers ever will.
Plugin shopping in month one. Stock plugins in any modern DAW are professional-grade. Buying a €400 compressor before you understand attack and release times means you have an expensive compressor you cannot use. Learn the stock channel strip first; the language of compression translates to any plugin you buy later. The vocal-mixing tutorial walks through the basic chain using stock tools, which is the right place to start.
Monitors too close to the wall, or too far apart. Studio monitors should sit roughly an arm's length out from the back wall, forming an equilateral triangle with the listening position — distance between monitors equal to the distance from each monitor to your ears. Pushed against the wall, the bass response inflates and mixes turn out thin everywhere else. Spread too wide, the stereo image hollows out in the centre where vocals usually sit.
No headphone amp for live tracking. Most interfaces have one headphone output. Recording a singer and a guitarist at the same time needs a €50 headphone amp splitter so each person can hear their own mix. It solves a problem that otherwise stops the session cold.
What to do in the first week
Once the gear is in and the room is sorted, the next bottleneck is workflow. Set the interface gain so that the loudest part of a performance hits around -12 dBFS to -6 dBFS in the DAW's meters, leaving headroom. Save a session template with two audio tracks, a stock compressor, and a stock EQ ready to go. Record the same source at three different mic positions and compare — what mic placement does to a recording teaches more about engineering than any tutorial.
After a week of recording, start using a reference track during mixing. Drop a commercial song in the same genre into the session on a separate track, level-match it to the mix, and toggle between the two. The ear cannot hold an absolute reference, only a comparative one.
Frequently asked
What is the absolute minimum I need to record at home?
A laptop with a free DAW (GarageBand on Mac, Cakewalk on Windows, Reaper anywhere), a USB audio interface around €120, an XLR microphone with a cable, a microphone stand, and a pair of closed-back headphones. That is enough to record finished tracks. The total comes to around €350-€400 with mid-tier choices on every line.
Do I need studio monitors if I already have good headphones?
Not for the first six months in an untreated room, and arguably not until the room is treated. Mixes made on headphones translate fine to other systems if you reference against commercial tracks during the mixing process. Adding monitors before the room is treated tends to make mixes worse, not better, because monitors expose the room's resonances and you start mixing to compensate for the room.
Should I buy a USB microphone instead of an XLR microphone and interface?
For podcasting and rough demos, a USB microphone like the Shure MV7 or Audio-Technica AT2020 USB is a reasonable shortcut and skips the interface entirely. For serious music recording, an XLR microphone plus a small interface is the better long-term investment because every later upgrade — a second microphone, a guitar input, studio monitors — plugs into the interface you already have. USB mics are end-of-line; XLR microphones are the start of a system.
How much of a difference does room treatment really make?
More than any equipment upgrade in the same price range. A €200 spend on properly placed broadband absorber panels typically improves mixes more than a €200 upgrade to any piece of equipment in a finished setup. The exception is the first interface — going from no interface to a competent one is a bigger jump than any room treatment can deliver.
Can I set up a home studio in a small bedroom or closet?
Yes, and small rooms are often easier to treat than large ones because there is less surface area to cover. A walk-in closet packed with clothes is an excellent vocal recording space — the clothes absorb almost all reflections. The trade-off in small rooms is bass build-up in corners, which makes mixing on monitors harder. Headphone-first workflow sidesteps that problem entirely.
What about acoustic foam panels — are they worth it?
Thin acoustic foam panels (the egg-crate style sold in beginner bundles) absorb high frequencies that were not your main problem and do almost nothing for the low-mid build-up that was. Proper broadband absorber panels — rockwool or fibreglass inside a fabric-wrapped wooden frame, typically 5-10cm thick — work across a much wider frequency range and are what professional studios actually use. Building four panels at home in a weekend costs around €150 and outperforms €400 of off-the-shelf foam.
If you want a structured way to learn the mixing and mastering side of a home studio — from gain staging through compression, EQ, reverb, and final loudness — our book Mixing & Mastering Simplified walks through the full process in 200 pages of plain-English explanation and full-colour diagrams. It is built for the producer who has the gear and now needs to learn what to do with it.
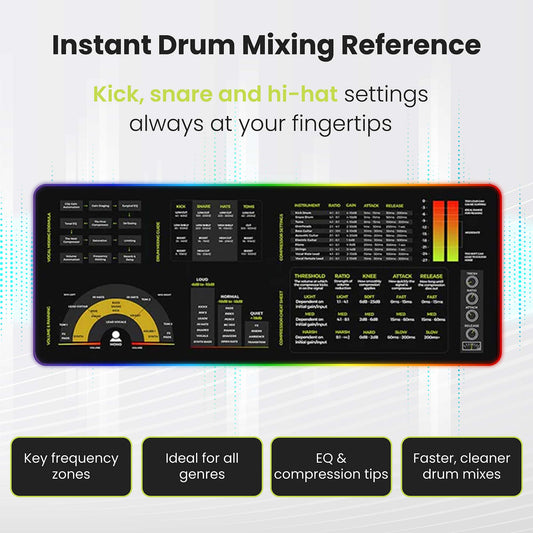
For a desk-side reference while you mix, the Mixing & Mastering Cheat Sheet Mousepad keeps the most-used compressor, EQ, and reverb settings in front of you while working, and the Instrument Frequency Cheat Sheet Poster shows where every common instrument lives in the spectrum so EQ decisions take seconds instead of minutes.
For specific gear picks at every stage of the setup, see Best Audio Interface for Home Studio, Best Studio Headphones for Mixing, Best Studio Monitors Under €500, and Best DAW for Beginners. For the workflow once recording is done, the vocal-mixing tutorial is the right next stop.






 Guitar Chords Chart Mousepad
 Guitar Theory Simplified (Paperback/PDF)
 Bass Guitar Theory Cheat Sheet Mousepad
 Bass Theory Simplified (Paperback/PDF)
 Music Theory Simplified - (Paperback/PDF)
 Music Theory Cheat Sheet Mousepad
 Ukulele Theory Simplified (Paperback/PDF)
 Ukulele Theory Cheat Sheet Mousepad
 Guitar Theory Cheat Sheet Mousepad
 Mixing Mastering Cheat Sheet Mousepad


