 4.8/5 on Trustpilot

Your vocal take sounds great in the booth, but the moment it drops into the mix it disappears. Quiet words vanish; loud ones jump out and stab. The fix isn't a louder fader or a fancy plugin chain — it's one tool, used well: the compressor.
In this guide we'll break down how to compress vocals the simple way — what a compressor actually does, what each control means, real starting settings for lead vocals, and a step-by-step plan you can run on your next session. No jargon rabbit holes. Just the part of mixing that makes a voice sit right.

What is a compressor?
A compressor is a tool that controls the volume of a signal over time. Its job is to reduce dynamic range — the difference between the loudest and quietest parts of a track. When the signal gets too loud, the compressor automatically turns it down; when things calm back down, it lets the level rise again.
Think of it as an invisible hand resting on the volume fader, constantly nudging it to keep your levels smooth and consistent. You're not riding the fader by hand on every syllable — the compressor does it for you, faster than you ever could.
On vocals this matters more than on almost any other source. A singer naturally varies in volume — soft on intimate verses, loud on the chorus, with the odd word that spikes. Compression evens those differences out, making quiet words easier to hear and stopping loud parts from leaping forward. The result is a balanced, polished vocal that stays present from the first line to the last.
How a compressor works: the five controls
Compression is one of the trickiest concepts for beginners, mostly because of its controls. But each one answers a simple question. Learn the question and the knob makes sense.

Threshold sets the exact volume point where compression begins. Signals above the threshold get turned down; signals below it pass through untouched. If your threshold is at -10 dB, a vocal peaking at -8 dB gets reduced, but a word sitting at -12 dB is left alone. Lower thresholds catch more of the performance; higher thresholds tame only the loudest peaks.
Ratio decides how strongly the compressor reacts once the signal crosses the threshold. At 2:1, for every 2 dB over the threshold only 1 dB comes through. At 4:1, every 4 dB over becomes 1 dB. At 10:1 and above you're essentially limiting — almost nothing gets past. For lead vocals, a moderate ratio does most of the work.
Attack controls how quickly the compressor reacts after the signal crosses the threshold. A fast attack clamps down immediately, taming sharp transients like plosive "p" and "b" pops — but go too fast and the vocal can sound flat. A slow attack lets the initial consonant punch through before compression catches the rest, which keeps energy and articulation.
Release controls how quickly the compressor lets go once the signal drops back below the threshold. A fast release sounds lively and punchy; a slow release is smooth and natural but can feel sluggish if overdone. The goal on vocals is a release that "breathes" with the phrasing — recovering between words without pumping.

Knee shapes how abruptly compression starts once the threshold is crossed. A hard knee kicks in instantly and fully — punchy and precise, great for drums. A soft knee ramps up gradually, which is smoother and more natural — perfect for vocals and acoustic sources. And finally, makeup gain raises the whole signal back up after compression has lowered it, so the compressed vocal matches its original loudness and sits correctly against the rest of the mix.
How to compress a lead vocal (step-by-step)
Here's the practical workflow. Run it in order and resist the urge to skip ahead.
Step 1 — Prepare the vocal first
Compression should enhance, not rescue. Before you reach for it, set proper gain staging, clean up noise, and do any obvious editing or de-essing. If a take has wild swings, a little volume automation before the compressor makes its job far easier. Compression works best as a finishing tool on good source material — not a patch for a bad recording.
Step 2 — Set the threshold
Play the loudest section of the vocal — usually the chorus — and lower the threshold until you see a few decibels of gain reduction on the busiest words. You're aiming for the compressor to engage on the peaks, not to be clamped down on every syllable. Lower threshold = more of the signal compressed; higher = only the loud peaks tamed.
Step 3 — Dial in the ratio
Start moderate. For most lead vocals a ratio in the 2:1 to 4:1 range gives transparent, musical control. Push toward higher ratios only when a vocal is especially dynamic or you want an obvious, upfront pop sound. Lower and gentle beats high and squashed.
Step 4 — Set attack and release
For vocals, a medium-to-slow attack (around 15–30 ms) lets consonants cut through so the words stay crisp, while a release around 100–300 ms lets the compressor recover between phrases without pumping. Then add makeup gain to bring the level back up, and fine-tune: toggle the compressor on and off to compare. If it sounds lifeless, ease the threshold or ratio. You're after subtle, musical control — not a crushed vocal.

Common mistakes to avoid
- Over-compressing. Too much gain reduction squashes the life out of a vocal, leaving it flat, dull, and fatiguing. If you're using heavy compression to fix every problem, revisit the recording, your gain staging, or your EQ first.
- Attack too fast. A super-fast attack flattens the consonants that give a vocal its clarity and bite. Slow it down until the words cut through again.
- Ignoring makeup gain when you A/B. A compressed vocal is quieter, and louder always sounds "better." Match levels with makeup gain before deciding whether the compression actually helped.
- Using a hard knee on vocals. The abrupt onset sounds obvious and clinical on a voice. A soft knee eases compression in and stays natural.
- Treating the compressor as a fix-all. Compression controls dynamics — it can't undo a noisy room, bad mic placement, or a harsh tone. Solve those at the source.
Why vocal compression matters
If you've ever asked "how do you mix a vocal so it sits right," compression is most of the answer. A voice carries the song — it's the element listeners lock onto first. When its dynamics are out of control, the whole mix feels unbalanced: the listener reaches for the volume knob, turning up to catch a whispered line and down when the chorus stabs. That's tiring, and it's the fastest way to make a mix sound amateur.
Controlled vocal dynamics do three things. They keep every word intelligible, so the lyric lands. They let the vocal stay present and competitive against a dense backing track without you cranking the fader. And they give you a stable, predictable signal to feed into the rest of your chain — EQ, reverb, delay — so those effects behave consistently. Master the compressor on vocals and you've unlocked the single biggest lever in a clean, professional mix.
Take it further
If you want a clear, visual walk-through of compression — thresholds, ratios, attack and release, plus the full cheat sheet of starting settings for every instrument — it's all laid out in Mixing & Mastering Simplified. It's the same step-by-step, no-fluff approach you've seen in this post, covering the entire mixing and mastering process in one place.
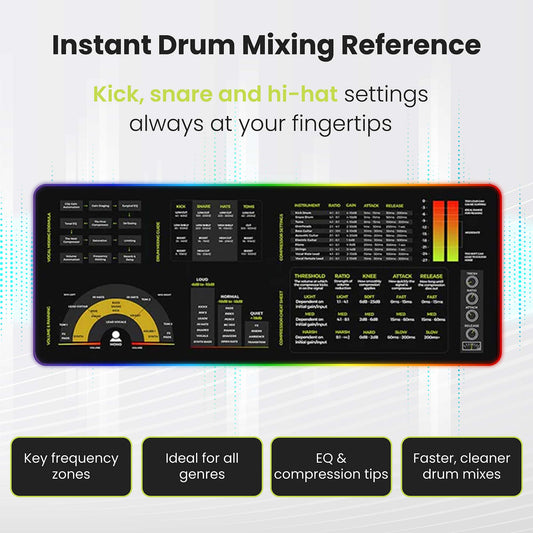
Want the settings next to you while you work? The Mixing & Mastering Cheat Sheet Poster and Cheat Sheet Mousepad put compressor starting points, signal-chain order, and more right next to your screen — no tab-switching mid-mix.
Fighting to make the vocal cut through a busy arrangement? The Instrument Frequency Cheat Sheet Poster shows where each instrument lives in the spectrum, so you can carve space for the voice. Or get everything together in the Mixing & Mastering Simplified Bundle.
FAQs about compressing vocals
What compressor settings should I use for vocals?
A good starting point for a lead vocal is a ratio of 2:1 to 4:1, an attack around 15–30 ms so consonants cut through, and a release around 100–300 ms so the compressor recovers between phrases. Set the threshold so you see a few dB of gain reduction on the loudest words, then add makeup gain to match the original level.
How much compression is too much on a vocal?
If the vocal sounds flat, dull, or fatiguing — or if the gain-reduction meter is slamming on every syllable — you've gone too far. Aim for a few decibels of reduction on the peaks. You should feel the consistency more than hear the processing.
Should I EQ or compress a vocal first?
Usually clean up the obvious problems first — gain staging, noise, and any harsh resonances with subtractive EQ — then compress. A cleaner signal lets the compressor respond to the performance rather than to noise or a problem frequency. Many engineers then add a touch of EQ after the compressor for final tone shaping.
Why does my vocal still get lost in the mix after compression?
Compression controls dynamics, but presence is also about frequency space. If the vocal competes with guitars or synths in the same range, no amount of compression will fix it — you need EQ to carve room. Check the frequency overlap between the vocal and the elements around it.
What's the difference between a compressor and a limiter on vocals?
They're the same tool at different extremes. A compressor with a moderate ratio gently smooths dynamics; a limiter is a compressor with a very high ratio (10:1 and above) that acts as a brick wall to stop peaks dead. On vocals you typically compress for smoothness and may add gentle limiting at the very end to catch any stray spikes.
This post is part of Musiciangoods' Mixing & Mastering Simplified series — practical production knowledge, taught visually, for people who want to understand what they're hearing. Explore more music production tools here.







 Guitar Chords Chart Mousepad
 Guitar Theory Simplified (Paperback/PDF)
 Bass Guitar Theory Cheat Sheet Mousepad
 Bass Theory Simplified (Paperback/PDF)
 Music Theory Simplified - (Paperback/PDF)
 Music Theory Cheat Sheet Mousepad
 Ukulele Theory Simplified (Paperback/PDF)
 Ukulele Theory Cheat Sheet Mousepad
 Guitar Theory Cheat Sheet Mousepad
 Mixing Mastering Cheat Sheet Mousepad


