4.8/5 on Trustpilot

Compression, EQ, de-essing, reverb. Most vocalists have heard of the tools — but very few know the order they're supposed to go in. Get the order wrong, and even pro plugins can make a vocal sound thin, harsh, or buried. Get it right, and a basic chain of stock plugins starts to sound like a record.
This guide walks through what a vocal chain is, the canonical order of a modern vocal chain, why each plugin sits where it does, and a 4-step plan to build your first one. Whether you're recording demos in your bedroom or finishing a release, this is the framework everything else builds on.

What is a vocal chain?
A vocal chain is the sequence of plugins (or hardware processors) that a vocal track passes through during mixing. Each plugin shapes the signal in a specific way — cutting unwanted frequencies, evening out volume, taming harsh "s" sounds, adding space — and the order they sit in determines how they interact.
The vocal is almost always the most important element in a song. Listeners notice it first, judge it most harshly, and forgive its imperfections least. A clean, intentional vocal chain is what turns a raw recording into something that sits naturally in the mix and feels emotionally connected to the listener.
Two things to understand up front. First, there's no single "correct" vocal chain — pop, rap, rock, R&B, and indie all use slightly different chains for slightly different reasons. Second, there is a canonical order that most engineers start from, and the variations are tweaks on that template, not departures from it. Learn the template first, then bend it.
How a vocal chain works (the order, plug by plug)
The reason order matters: every plugin reacts to whatever the previous plugin sent it. A compressor reacting to an unfiltered signal full of low-end rumble will pump on every plosive. A de-esser placed before compression will tame sibilance that the compressor was about to flatten anyway, wasting both. The chain is a conversation between plugins, and the order is the script.
Here's the canonical vocal chain, in order, with what each stage is for:
- Gate or expander — cleans up bleed, breath noise, and low-level room sound between phrases. Optional for clean recordings; essential for noisy ones.
- Subtractive EQ — high-pass filter at 80–120 Hz to remove rumble; a narrow cut around 200–400 Hz to clear "mud"; a cut around 2–5 kHz only if the recording is harsh.
- Compressor (level evening) — a moderate ratio (3:1 to 6:1) with 3–6 dB of gain reduction. The job is consistency, not character — every word should sit at roughly the same loudness.
- De-esser — targets sibilance in the 5–9 kHz range. Place it after the compressor so harsh "s" sounds don't get amplified by the compressor's makeup gain.
- Additive EQ — gentle boosts for character. A small lift at 3–5 kHz adds presence and intelligibility; a high-shelf at 10–15 kHz adds "air" and breath.
- Saturation (optional) — subtle harmonic warmth. Tape, tube, or transformer-style saturation glues the vocal together and helps it cut through a busy mix without raising the volume.
- Reverb (on a send) — short room or plate for intimacy, longer hall or chamber for emotion. Always on a send, not an insert, so you can blend it independently.
-
Delay (on a send) — slap delay (80–120 ms) for vintage feel, quarter-note or eighth-note delay for rhythmic depth. Sent in parallel like reverb.

How to build your first vocal chain (4-step plan)
Step 1 — Start with EQ subtractive
Before compression, before anything, clean the signal. Drop a high-pass filter at 80 Hz on a male vocal or 120 Hz on a female vocal — that single cut removes 90% of the rumble that would otherwise confuse the compressor. Then sweep through 200–400 Hz with a narrow bell, find the muddiest spot, and cut 2–4 dB. This is the unglamorous work that makes everything downstream easier.
Step 2 — Add a level-evening compressor
Use one of your DAW's stock compressors. Set the ratio between 3:1 and 6:1, the threshold so you're getting 3–6 dB of gain reduction on the loudest words, attack medium-fast (around 10 ms), release medium (around 80–120 ms). The goal isn't to crush — it's to make every word sit at roughly the same volume so the listener doesn't have to ride the volume knob in their head.
Step 3 — Tame sibilance with a de-esser
After compression, place a de-esser. Set the detection frequency between 5 and 9 kHz — different vocalists are sibilant in different ranges, and you'll need to listen and adjust. Set the threshold so the de-esser only engages on the harshest "s," "sh," and "t" sounds, not the body of the vocal. Aim for 2–4 dB of reduction during sibilants and zero everywhere else.
Step 4 — Add character with EQ, then space with sends
Now an additive EQ for character — a small bell boost around 3–5 kHz for clarity, a high-shelf around 12 kHz for air. Subtle moves only; 1–2 dB is plenty. Finally, set up a reverb send and a delay send. Send the vocal to both, blend until the vocal sits in a believable space without sounding washed out. If you can hear the reverb when the vocal is silent, it's too much.
Common mistakes to avoid
- Compressing before high-passing. Low-end rumble triggers the compressor on plosives and breaths, eating up gain reduction that should be flattening words. Always EQ-subtract first.
- De-essing before compression. The compressor's makeup gain re-amplifies whatever sibilance survived. Order matters: compressor first, de-esser second.
- Using reverb and delay as inserts instead of sends. An insert means 100% wet/dry mix lives on the vocal track. A send lets you blend the wet effect independently and keeps the dry vocal clean.
- Stacking too many compressors. Some pros use two — one for level evening, one for character. For your first chain, one is enough. Two compressors on a sloppy vocal track multiply the problems, not fix them.
- Boosting the highs to fix muddiness. If a vocal sounds muddy, the fix is in the low-mids (a 200–400 Hz cut), not the highs. Boosting "air" on a muddy vocal makes it harsh on top and muddy on the bottom.
Why a good vocal chain matters
The vocal carries the song. Listeners forgive a lot in a mix — they'll forgive uneven drums, mediocre bass, even some pitchiness — but they will not forgive a vocal that sounds amateur. A coherent vocal chain is the difference between a track that sounds like a demo and one that sounds like a release.
It also saves you time. Most home producers spend hours pushing faders, adding plugins, second-guessing decisions. A well-built vocal chain settles 80% of the questions in advance: high-pass is set, compressor is doing its job, de-esser is catching sibilance, reverb send is dialled in. What you do after the chain is creative work — automation, riding the lead, adding doubles. The chain itself just needs to be clean, intentional, and consistent.
Take it further
For a full visual walk-through of every component in a vocal chain — EQ ranges by instrument, compressor settings for male and female leads, de-esser placement, reverb and delay choices — the EQ, dynamics, and effects chapters in Mixing & Mastering Simplified cover the whole thing visually, with diagrams for every plugin and every problem area.
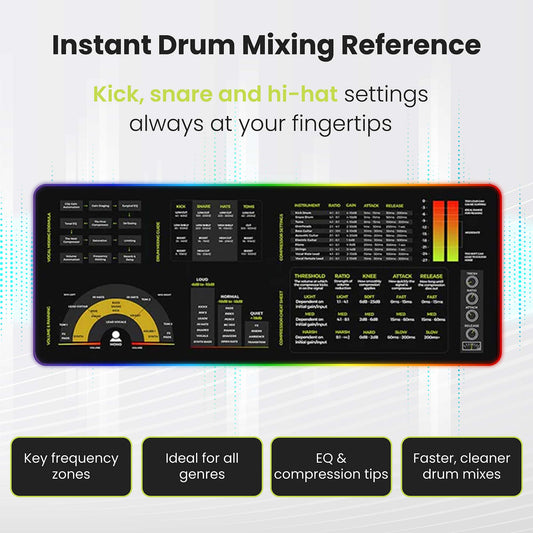
Want a printed cheat sheet for the settings on every common source? The Mixing & Mastering Cheat Sheet Poster and Cheat Sheet Mousepad put compressor ratios, de-esser ranges, and reverb starting points at your desk — so you can dial in any vocal without flipping through the book.
Pair it with the Instrument Frequency Cheat Sheet Poster for fast EQ reference on every instrument in the mix, or grab everything together in the Complete Mixing & Mastering Bundle.
FAQs about vocal chains
What is a vocal chain?
A vocal chain is the sequence of plugins a vocal track passes through during mixing — typically EQ, compression, de-essing, more EQ, and effects like reverb and delay. The order matters because each plugin reacts to whatever the previous one sends it.
What's the right order for a vocal chain?
The canonical order is: gate (optional) → subtractive EQ → compressor → de-esser → additive EQ → saturation (optional) → reverb send → delay send. Variations exist for different genres, but starting from this template and tweaking is more reliable than reinventing the order from scratch.
Should EQ go before or after compression on vocals?
Both, in different roles. Subtractive EQ (high-pass filter, mud cut) goes before the compressor so it's not reacting to rumble. Additive EQ (presence and air boosts) goes after, so the compressor's level-evening doesn't undo the boosts you just added.
Do I need a de-esser on every vocal?
Most lead vocals benefit from at least mild de-essing because microphones and compressors both tend to emphasize sibilance. If you don't hear harsh "s," "sh," or "t" sounds and the recording was clean, you can skip it. When in doubt, set up a de-esser with a high threshold so it only catches the worst offenders.
What plugins do I need to start a vocal chain?
Stock plugins are enough. Every modern DAW ships with an EQ, a compressor, a de-esser (or a frequency-specific compressor that can act as one), a reverb, and a delay. A pro vocal chain built entirely from Logic, Pro Tools, or Ableton's stock plugins beats a sloppy chain of expensive third-party plugins every time.
This post is part of Musiciangoods' Mixing & Mastering Simplified series — practical mixing technique, taught visually, for producers who want their vocals to sound like a record. Explore more mixing & mastering tools here.