4,8/5 på Trustpilot

Compression is the effect everyone tells you to use and no one explains clearly. Threshold, ratio, attack, release — it feels like a cockpit of confusing knobs. But a compressor does one simple thing: it's an automatic volume control that smooths out the loud and quiet parts of a track. Once that clicks, the rest is just detail.
In this guide we'll explain what a compressor does, break down each control in plain language, walk through a six-step setup, and cover the mistakes that make beginners' mixes sound worse, not better.

What is a compressor?
A compressor is a tool that controls the volume of a signal over time by reducing its dynamic range — the difference between the loudest and quietest parts of a track. When the signal gets too loud, the compressor automatically turns it down; when things calm back down, it lets the level rise again. Think of it as an invisible hand resting on the volume fader, constantly keeping levels smooth and consistent.
Compression is one of the trickiest concepts for beginners because the effect is often subtle. Done right, you feel the difference more than you hear it — the track just sounds tighter and more polished. Done wrong, the mix sounds flat, squashed, and lifeless. The goal is musical control, not maximum squashing.
What compressors are used for
- Taming dynamics — keeping vocals, drums, or instruments even and controlled.
- Shaping tone — adjusting attack and sustain to make sounds punchier or smoother.
- Peak limiting — catching sudden volume spikes to prevent clipping.
- Sidechain compression — ducking one sound (like a bass) when another plays (like a kick).
- Parallel compression — blending a heavily compressed copy with the original for power and clarity.
How a compressor works: the key controls
To get the most from a compressor you need to understand how its controls work together. Each one shapes how the compressor reacts to your audio.

Threshold is the volume point where the compressor starts working. Anything louder than the threshold gets turned down; anything below it passes through untouched. Set the threshold at -10 dB and a vocal peaking at -8 dB gets compressed, while a part sitting at -12 dB is left alone. Lower thresholds catch more of the sound; higher thresholds only tame the loudest peaks.
Ratio decides how much the compressor reduces a signal once it crosses the threshold. A low ratio like 2:1 is gentle — for every 2 dB over the threshold, only 1 dB comes through. A high ratio like 10:1 squashes almost everything, behaving like a limiter. Think of it as sunglasses for your audio: lightly tinted lenses smooth the glare, very dark lenses block nearly all the light.
Attack controls how quickly the compressor reacts after the signal crosses the threshold. A fast attack clamps down immediately, taming sharp transients like drum hits — controlled, but it can sound flat if overused. A slow attack lets the initial punch through before compressing, keeping energy and impact. It's like a camera shutter: fast freezes every detail, slow allows natural motion blur.
Release controls how quickly the compressor lets go once the signal drops back below the threshold. A fast release makes a track sound lively and punchy; a slow release is smooth and natural but can feel sluggish if overdone. Think of braking in a car — slamming the brakes and releasing instantly versus easing off smoothly.
Knee shapes how gradually compression kicks in. A hard knee applies compression instantly at the threshold for a punchy, precise sound (great on drums). A soft knee ramps in gradually for a smoother, more natural result (great on vocals).
Makeup gain compensates for the volume the compressor removed. Because compression turns the loud parts down, the overall track gets quieter — makeup gain raises the whole signal back up so it sits at a healthy level in the mix. Compression turns down the loud bits; makeup gain turns the whole track back up evenly.
How to use a compressor: a 6-step setup
Step 1 — Prepare your audio and set the threshold
Balance your mix and clean up noise first — compression should enhance a good recording, not rescue a bad one. Then lower the threshold until the compressor starts acting on the loudest parts. Low thresholds compress more of the signal; high thresholds only catch peaks.
Step 2 — Dial in the ratio
Choose how strongly it clamps. A gentle 2:1–4:1 is transparent and good for general control; 4:1–6:1 gives more grip for drums or bass; 10:1 and above is heavy limiting to stop clipping.
Step 3 — Set attack and release
Use a fast attack to tame sharp hits or a slow attack to keep punch and energy. A fast release adds excitement, while a slow release sounds smooth — just not so slow that the track feels dull.
Step 4 — Add makeup gain and fine-tune
Bring the volume back up with makeup gain so the compressed track matches its original loudness. Then toggle the compressor on and off to compare. If it sounds lifeless, ease up on the threshold or ratio. The target is subtle, musical control — not the most compression you can apply.

Common mistakes to avoid
- Over-compressing. Crushing a track makes it squashed, dull, and fatiguing. If it sounds lifeless, back off the threshold or ratio. Subtle almost always wins.
- Using compression to fix bad recordings. Compression is a finishing tool, not a repair tool. Fix the performance, gain staging, and EQ first.
- Forgetting makeup gain. Without it, the compressed track sounds quieter than before and you'll wrongly judge it as worse. Match the levels before comparing.
- A too-slow attack on transients. If you want to tame a snappy snare or a plosive vocal, a slow attack lets the peak sneak through. Speed up the attack to actually catch it.
- Chasing "perfect" numbers. Cheat-sheet settings are starting points, not targets. Every track is different — use your ears and the bypass button to decide what's working.
Why the compressor matters
The compressor is essential to modern music because it makes elements blend while staying loud, clear, and competitive — in headphones, in a car, or through club speakers. Once you understand it you get:
- Even, controlled performances where quiet words and notes stay audible and loud ones don't jump out.
- Punch and energy — drums hit harder and basslines stay solid and consistent.
- Glue — gentle compression across a group or the whole mix makes everything feel like it belongs in the same space.
Take it further
The compressor is the centerpiece of the full dynamics chapter — limiters, expanders, de-essers, sidechain and parallel compression, and the complete compressor cheat sheet — all covered visually in Mixing & Mastering Simplified.
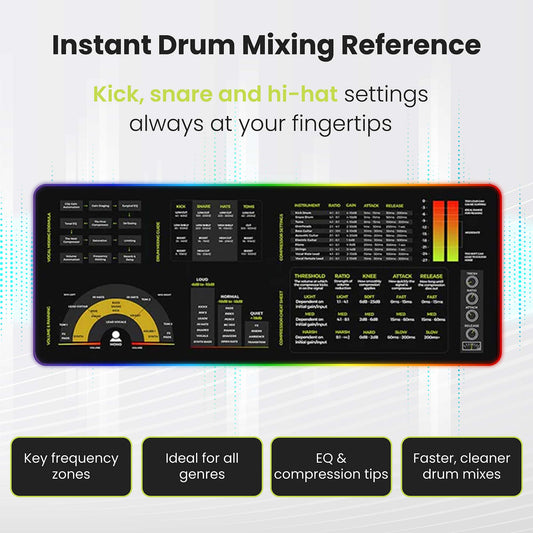
Want the compressor starting points at your desk? The Mixing & Mastering Cheat Sheet Poster and Cheat Sheet Mousepad keep ratio, attack, and release settings for every instrument within reach while you mix.
Pair them with the Instrument Frequency Cheat Sheet Poster for EQ reference alongside your dynamics, or grab everything together in the Complete Mixing & Mastering Bundle.
FAQs about compressors
What does a compressor do in mixing?
A compressor reduces the dynamic range of a track — the gap between its loudest and quietest parts — by automatically turning down anything above a set volume threshold. The result is a smoother, more consistent, more polished sound.
What are the main compressor controls?
Threshold (where compression starts), ratio (how hard it clamps), attack (how fast it reacts), release (how fast it lets go), knee (how gradually it engages), and makeup gain (which restores the lost volume). Together they shape exactly how the compressor responds.
What's a good compressor setting for beginners?
Start gentle: a ratio around 2:1–4:1, a medium attack and release, and a threshold lowered just until the loudest parts are being tamed by a few dB. Then add makeup gain to match the original level. Adjust from there using your ears.
What's the difference between attack and release?
Attack is how quickly the compressor reacts once the signal goes over the threshold; release is how quickly it stops once the signal drops back under. Fast attack tames transients, slow attack keeps punch; fast release adds energy, slow release sounds smooth.
Why does my track sound worse after compressing?
Usually it's over-compression or missing makeup gain. Too much threshold or ratio squashes the life out of a track, and without makeup gain it just sounds quieter. Ease off the settings, restore the volume, and bypass to compare against the original.
This post is part of Musiciangoods' Mixing & Mastering Simplified series — practical production knowledge, taught visually, for producers who want to understand what they're hearing. Explore more mixing and mastering tools here.