
Setting up your mixing session the right way is one of the most important steps in the entire mixing and mastering process. In the first two lessons from Mixing & Mastering Simplified, we walk through the complete session setup inside Logic Pro—everything you should do before you start touching plugins or balancing levels.
Video 1: Setting Up a Mixing Session
In the first video, we cover the foundation of every mix. You’ll learn how to:
-
Check the sample rate of your audio files in macOS Finder
-
Match your Logic Pro project’s sample rate correctly
-
Avoid pitch or playback issues caused by mismatched files
This ensures your audio plays back at the correct speed and keeps your entire session stable.
Video 2: Project Tempo, Buffer Size & Importing Stems
Next, we set your project's tempo and optimize Logic for smooth mixing. You’ll learn how to:
-
Set the correct BPM for your session
-
Understand why tempo matters for synced effects and automation
-
Adjust your buffer size for glitch-free playback during mixing
-
Import stems into Logic Pro the right way using Create New Tracks
These steps help you build a clean, organized session where everything runs efficiently and stays in sync.
Video 3: Organizing & Color Coding
Now that all stems are imported, the next step is organizing your session. This may seem like a minor detail, but it has a massive impact once you start mixing. A clean, structured session saves time, keeps you focused, and prevents the frustration of searching for tracks or losing your place.
Group Similar Tracks Together
Start by placing related instruments next to each other. This keeps your workflow smooth and logical. Here’s a simple order many mixers use:
-
Vocals at the top
-
Drums underneath
-
Bass right below the drums
-
Synths, pads, and other instruments following afterward
This structure makes navigation easy and helps you stay in control of the mix.
Apply Color Coding
Once everything is in place, color-code your tracks.
In Logic Pro, right-click the track header and select Assign Track Color.
Choose colors that make sense — like blue for vocals, green for drums, yellow for bass, and so on.
A consistent color scheme makes it much easier to visually identify parts of the mix, especially in busy projects.
Stay Consistent
There’s no “right” order. What matters is consistency. Using the same layout and colors across different sessions makes your entire mixing workflow faster and more efficient.
This video is part of the full Mixing & Mastering Simplified series, designed to give you a complete step-by-step mixing workflow—supported by cheat sheets, diagrams, and QR-based lessons.
Perfect for Beginners or Experienced Producers
This series is designed to follow the structure of the Mixing & Mastering Simplified book, but the videos are useful even if you’re brand new to mixing. Each lesson is short, clear, and focused on one simple step at a time.
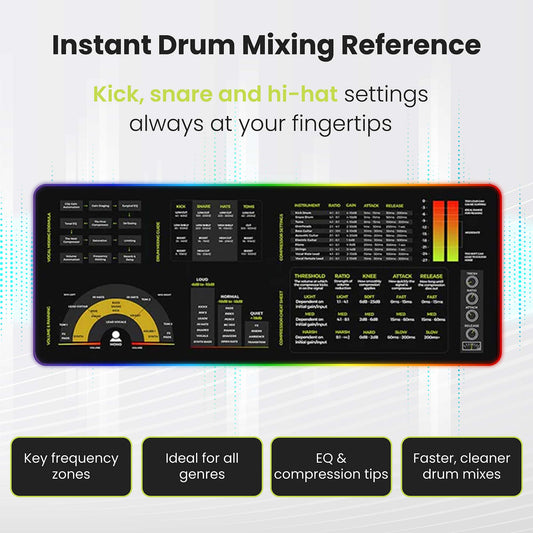
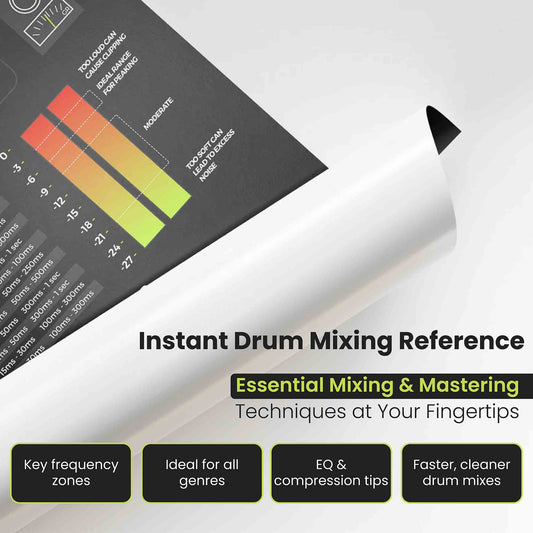
If you want the full structured program—including cheat sheets, diagrams, and full QR-code video lessons—check out Mixing & Mastering Simplified on Musiciangoods.


 Folha de Cola para Mistura e Masterização Mousepad


