 4.8/5 on Trustpilot

They look almost identical. Same kind of meter. Threshold, attack, release, gain. A compressor and a limiter sit side by side in every DAW, and most producers reach for one when they should be reaching for the other. The result is mixes that feel either flat and lifeless or clipped and brittle. Knowing which tool to grab is one of the fastest ways to make your tracks sound more professional.
This guide breaks down exactly what a limiter is, what a compressor is, how they actually differ under the hood, and when to reach for each. By the end, you'll know why every modern master ends in a limiter, why no compressor can fully replace one, and how to use both in the same chain without doubling up.

What is a compressor?
A compressor is a dynamics processor that reduces the difference between the loudest and quietest parts of a track. When the signal goes above a chosen threshold, the compressor turns it down by a chosen amount. When the signal drops back below the threshold, the compressor lets go and the signal continues at its natural level.
The job is consistency. A vocal that swings from a whisper to a shout doesn't sit comfortably in a mix — the quiet words disappear and the loud ones jump out. Compression evens that out, making every word sit at roughly the same loudness. It does the same thing for drums, bass, and any other source where the dynamic range is fighting you.
A compressor has five core controls: threshold (when it starts working), ratio (how aggressively it pulls peaks down), attack (how fast it responds), release (how fast it lets go), and makeup gain (how much you raise the output afterward to compensate for what was reduced). Tuned correctly, the result feels controlled, polished, and tight — without the listener consciously noticing anything.

What is a limiter?
A limiter is a specialized compressor with one job: nothing goes above its ceiling. Ever. If a compressor gently lowers loud parts, a limiter stops them dead. The output cannot exceed the level you set, full stop. That's why every mastered track ends with a limiter — it's the safety net that prevents digital clipping while pushing perceived loudness to commercial levels.
Technically, a limiter is just a compressor with a very high ratio (10:1 or higher, often ∞:1) and a very fast attack. But functionally, it behaves like a different tool. You don't reach for a limiter to add character or shape the feel of a part. You reach for it to enforce a hard maximum.

Modern limiters add one more trick: a lookahead. The plugin analyses a few milliseconds of audio ahead of the playhead so it can catch peaks before they happen, rather than reacting after the fact. That tiny bit of foresight is what makes a mastering limiter so transparent — it stops peaks without any of the audible "pulling" you'd get from a slow compressor doing the same job.
Limiter vs compressor: the real difference
Both tools sit in the same family. Both reduce dynamics by turning loud signals down. The difference comes down to how aggressive the reduction is and what you're trying to accomplish.
A compressor smoothly shapes the dynamic envelope of a sound. With a ratio of 2:1 to 6:1 and a moderate attack and release, it lets some of the natural movement of the performance through while still evening it out. It's a tool for feel — punchy drums, intimate vocals, glued mix buses.
A limiter, by contrast, is a tool for protection. With an infinite ratio and an extremely fast attack, it enforces an absolute ceiling. You don't tune a limiter for character. You tune it for "nothing crosses this line."
A useful way to remember it: a compressor decides how loud is too loud, then negotiates. A limiter decides how loud is too loud, then refuses.
When to use a compressor
Reach for a compressor whenever you want to shape the dynamics of a track rather than block them. Some of the most common use cases:
- Vocals — A 3:1 to 6:1 ratio with 3–6 dB of gain reduction smooths out the volume jumps between words and verses so the lead vocal sits consistently in front of the mix.
- Drums — A medium ratio with a slow attack lets the initial transient of a snare or kick through, then compresses the tail. The result is more punch, not less.
- Bass — Compression evens out the volume of individual notes so the low end stays solid and supportive instead of jumping in and out of the mix.
- Mix bus glue — A gentle compressor on the whole mix (low ratio, 1–2 dB of reduction) makes the elements feel like they're in the same space, the same room, the same record.
- Parallel compression — Heavy compression on a duplicate of a track, blended back in underneath the dry signal, adds power and density without sacrificing the natural transients of the original.
In every one of these cases, the compressor is doing creative work. You're choosing how the dynamics feel, not just protecting against clipping.
When to use a limiter
Limiters live at the end of chains. They're the last thing that touches the audio before it leaves the channel, the bus, or the master. The most common places to use one:
- Mastering — The final plugin in the chain, used to raise overall loudness to competitive levels while keeping peaks under -0.1 dB. This is the single most important use of a limiter in modern production.
- Mix bus protection — A subtle limiter across the master bus during mixing prevents unexpected peaks from clipping while you're still working on the song.
- Peak control on individual tracks — A limiter on a drum bus or vocal channel can catch extreme transients (snare cracks, vocal plosives) that would otherwise spike above your compressor's working range.
- Live broadcast and stream protection — When you can't predict the input level, a limiter at the end of the chain guarantees nothing distorts on the way out.
Notice the pattern: the limiter is always doing protective work, not creative work. If you're using a limiter to make something sound a certain way, you're really after a compressor with a high ratio — which is a different conversation.
Why both belong in the same chain
Compressors and limiters aren't competitors. They're partners. A clean mastering chain uses the compressor to even out dynamics and add cohesion, then the limiter as the final ceiling to maximize loudness without clipping.
The order matters: compressor first, limiter last. The compressor handles the gradual shaping. The limiter catches the few remaining peaks that slip through. If you reverse the order, the limiter is fighting full-amplitude transients on every hit, which forces it to work harder and sound less transparent.
On individual tracks, the same logic applies. Compress a vocal to even it out, then optionally add a brick-wall limiter at the end of the vocal chain to catch the occasional spike that the compressor missed. The compressor does 95% of the work; the limiter handles the 5% that gets through.
How to use a limiter and compressor together (4-step plan)
Step 1 — Compress first for level evening
On the source track, set a compressor with a 3:1 to 6:1 ratio, threshold tuned for 3–6 dB of gain reduction on the loudest parts, attack medium-fast (10 ms), release medium (80–120 ms). The goal is consistency: every word, every drum hit, every note should sit at roughly the same loudness.


Step 2 — Add a limiter at the end of the chain
After all your other processing, drop a limiter on the master output (or on the individual track, if you're protecting against transient spikes). Set the ceiling to -0.3 dB or -0.1 dB — never 0 dB, because some playback systems add tiny amounts of distortion at the boundary.
Step 3 — Raise input gain until peaks just touch the ceiling
Slowly push the limiter's input gain (or threshold) until the loudest peaks are catching the ceiling with about 1–3 dB of gain reduction. Stop before the track starts to feel squashed or dull. If you can hear pumping, you've gone too far.
Step 4 — Check loudness against a reference
Pull up a commercial track in the same genre and switch between it and your master at matched perceived loudness. Aim for around -14 LUFS for streaming, -9 to -11 LUFS for genres like EDM or hip-hop. If your track sounds quieter, raise the limiter input a touch. If it sounds harsh or fatiguing, pull back.
Common mistakes to avoid
- Using a limiter to "compress" a track. A limiter will technically reduce dynamics, but it won't sound musical doing it. Use a compressor for shaping, a limiter for ceilings.
- Setting the limiter ceiling at 0 dB. Always leave at least -0.1 dB of headroom. Streaming codecs and consumer playback systems can introduce inter-sample peaks that distort if you don't.
- Stacking limiters in series instead of one strong limiter at the end. Multiple limiters multiplies the artifacts — distortion, pumping, loss of transients. One limiter, well-tuned, at the very end.
- Pushing the limiter too hard for loudness. Past 3–4 dB of gain reduction on a master, most tracks start to feel flat and lifeless. Modern streaming platforms normalize loudness anyway, so extreme limiting buys you nothing.
- Confusing peak meters with loudness meters. A peak meter shows the highest sample level. A LUFS meter shows perceived loudness. Streaming platforms target LUFS, not peaks — use both.
Why understanding the difference matters
Mixing and mastering aren't about adding plugins until something sounds different. They're about reaching for the right tool at the right moment. The difference between a compressor and a limiter is the difference between shaping a sound and protecting a sound — between musical decision and technical guarantee.
Once you know which tool you actually need, you stop layering compressors that don't quite do what you want. You stop crushing tracks with limiters that should have been compressors. You start making faster, cleaner decisions, and your mixes start translating better across speakers, headphones, cars, and streaming platforms.
Take it further
The full breakdown of every dynamics tool — compressor, limiter, expander, de-esser — with diagrams, settings tables for every common source, and step-by-step workflows, lives in Mixing & Mastering Simplified. The chapter on dynamics is the longest in the book for a reason: most mixing problems are dynamics problems in disguise.
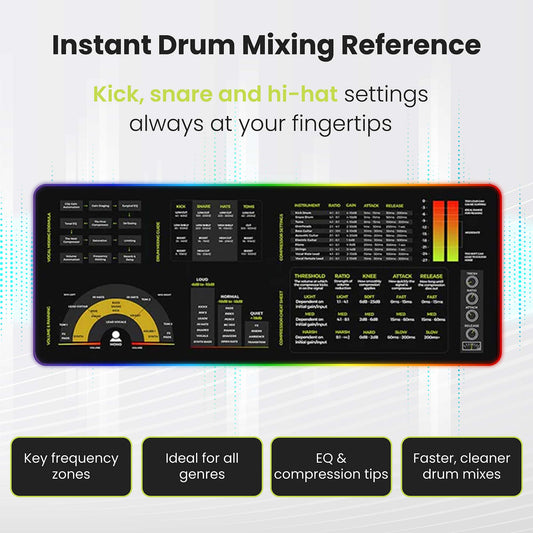
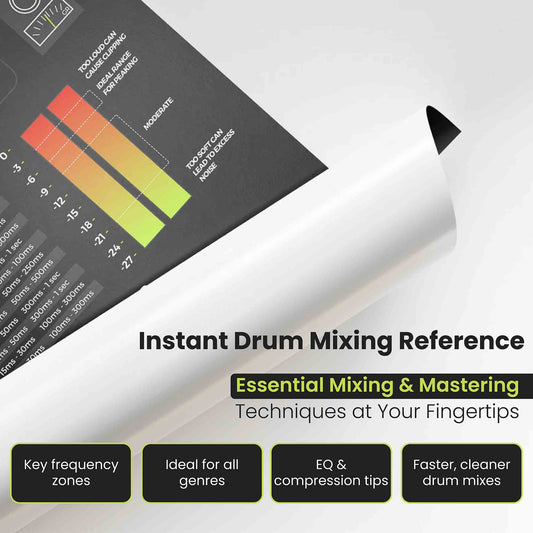
Want the settings reference at your desk? The Mixing & Mastering Cheat Sheet Poster and Cheat Sheet Mousepad put compressor ratios, attack/release starting points, and limiter ceilings within arm's reach — so you can dial in a vocal or master without breaking your flow.
Need to know which frequencies belong to which instrument before you compress? The Instrument Frequency Cheat Sheet Poster is the visual reference most engineers wish they'd had on day one. Or grab everything together in the Complete Mixing & Mastering Bundle.
FAQs about limiters and compressors
What is the difference between a limiter and a compressor?
A compressor smoothly reduces dynamic range by pulling loud signals down, using ratios from 2:1 to 6:1. A limiter is a specialized compressor with a very high ratio (10:1 or infinite) and a fast attack that enforces an absolute ceiling — nothing can cross it. Compressors are for shaping feel; limiters are for protecting against clipping.
Can a limiter replace a compressor?
No. A limiter applied across an entire dynamic range will sound harsh and unmusical because it only reacts when the signal hits its ceiling. A compressor works across a much wider window of the signal and shapes the feel of the track. Use a compressor for level evening and tone, and a limiter as a final safety net.
Should I use a compressor and limiter on the same track?
Yes — that's the standard professional chain. The compressor evens out levels and shapes the dynamic envelope. The limiter sits last and catches whatever peaks slip through, preventing clipping and maximizing loudness. Always compressor first, limiter last.
What ratio makes a compressor a limiter?
Generally, a ratio of 10:1 or higher with a very fast attack functions as a limiter. Modern brick-wall limiters use ratios approaching ∞:1 (infinite) — meaning that no matter how loud the input gets, the output stops at the ceiling. Most plugins labeled "Limiter" are infinite-ratio limiters with lookahead processing built in.
Where should I put a limiter in the signal chain?
At the very end. The limiter is always the last plugin on a track or on the master bus, after EQ, compression, saturation, and any creative effects. Its job is to set the final ceiling, so it has to see the signal after everything else has shaped it.
This post is part of Musiciangoods' Mixing & Mastering Simplified series — practical mixing concepts, taught visually, for producers who want to understand what their plugins are actually doing. Explore more mixing and mastering tools here.







 Χάρτης Ακκόρντων Κιθάρας Mousepad
 Σημειωματάριο Θεωρίας Μουσικής Mousepad
 Φύλλο Απάτης Μίξης και Μάστερινγκ Mousepad


